

Stiffening Up the X52 Pro
So I’ve yet to actually talk about the Saitek X52 Pro joystick, and I might Soon™ (no guarantees), but for reference, here is a picture:

Until then, let’s talk about one thing: it’s lack of actual resistance… and how I fixed that.
The Joystick Mechanism
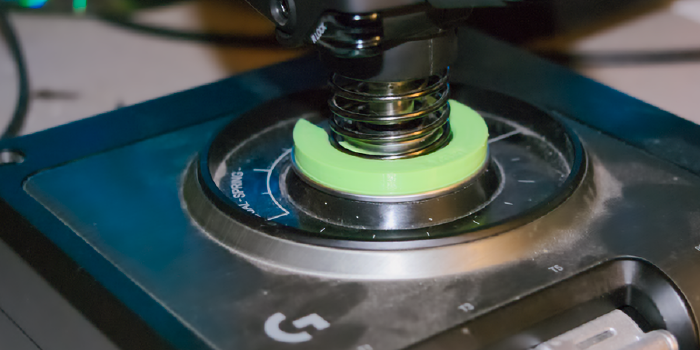
Notice at the bottom of the joystick, the small silver plate with a spring on it. This is what actually provides the centering force, the bottom is conically shaped, and as you push the stick off-center, it gets pushed up, pushing against the spring. This, in turn, wants to press it down, therefore centering the stick. This is what you’re actually pushing against… almost.
It’s actually really weak, and just resting my hands on the thing pushes it to about half-deflection. Nice for control and the ability to make snap changes, but I also like the ability to feel like I’m controlling something, which it doesn’t really have.
It turns out, that spring is actually pretty strong, and it doesn’t need to be compressed much, but it needs to be compressed. To that end, I 3D printed some spacers to do that. Do note, the design is not perfect, and the inner lip has started to degrade as the printer couldn’t quite make it, more on that later.
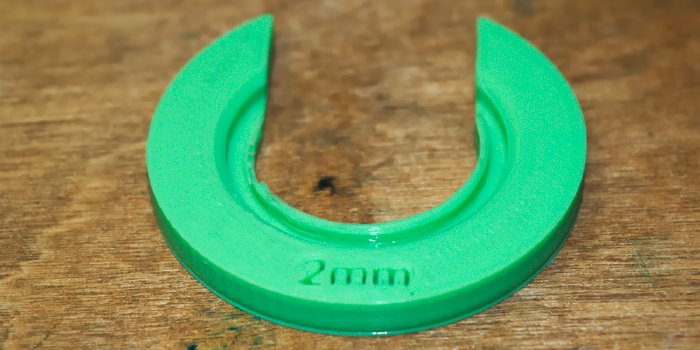
The Spacers
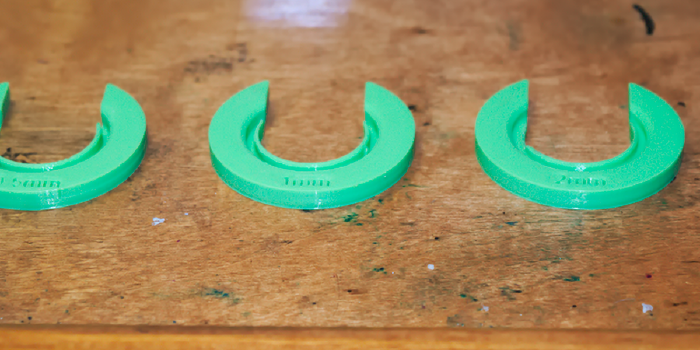
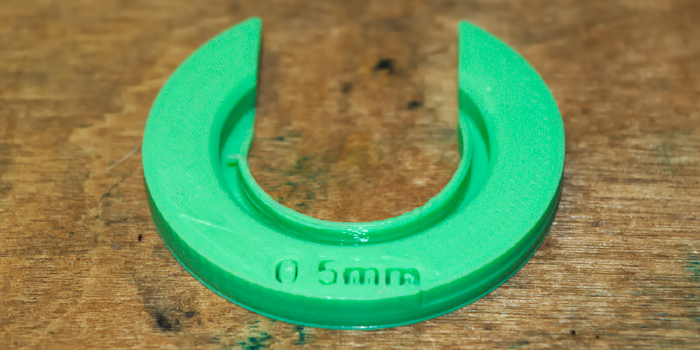
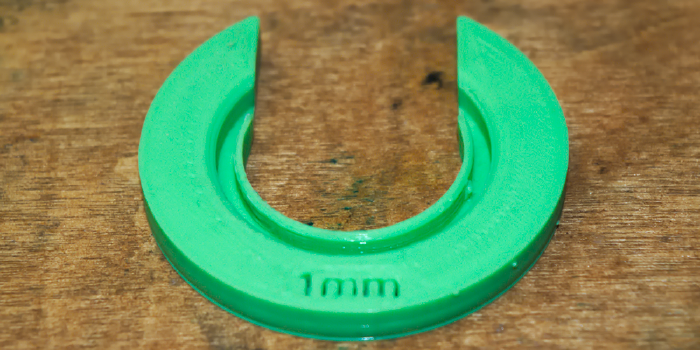
First off, I made three different variations, one of them adds an extra 0.5mm of spring compression, there’s also a 1mm, and 2mm, plus a single zip for all of them. A Thingiverse Thing is also available. Only two millimeters actually seriously gives this thing some push. Now much that you have to actively fight it, or that you’ll get a workout, but now it feels more like, in my mind, something like a Logitech Extreme 3D Pro.
I made all three because people have different preferences, and you can try and find the one that you like the best, personally, I think the 1mm works just fine for me.
Installing
Step 1: print the darn thing… I don’t own a manufacturing shop, you’re on your own on this one. Again, here’s a Thingiverse link.
This is… tricky, in the sense of it feels like you need three hands to do it. First get your fingers in between the coils of the large outer spring and pull it up (or flip the thing over and pull it down) enough to slide the spacer in. I designed it to be a clip fit, so it’ll click into place. Once this is done, you can drop the spring into the groove, and it’s done. Make sure the spring is seated in the groove and not on top of it, and give the thing a little spin once it’s in, make sure the spring is laying flat inside and not caught on something.
That’s it! To remove, just pull the spring up again, get your fingers behind the cutout, and just shove it off, then release the spring.
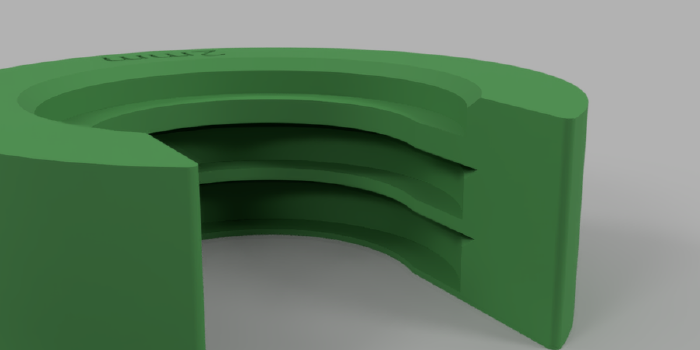
Design
It wasn’t really that hard to design, in theory, I just needed to tweak it a few (okay, 6) times to get the dimensions right. The outer diameter is pretty arbitrary, the inner one is meant to be a close fit with the joystick component, but not too close. I had to really tweak the size of the straight cutout so that it slides on relatively easily and also still has a little grip force. The overall height was, well, not fixed, but had some constraints. Too small and it’d be hard to manipulate and hold, as well as be fragile. Too large, and you’re going to have to heave a pretty tough spring over all that material.
I chamfered (read: made a slope with) the walls of the groove (as you can see on the ones I actually printed) so the spring could potentially slide down over them easier, though the inner-side one is a little too thin, the printer (LulzBot TAZ 6, I believe) couldn’t handle that, and they either came out a little under-extruded, or just overall weak, as you can see by the pieces broken off.
Since I don’t really need that wall in the first place, I just removed it, easy enough.
Other than that, I also cut the part size into the body of the thing, so you won’t ever mix them up.
A Weird Observational Footnote
Fun fact, if you rotate the stick around in a wide circle, the spacer component will slowly migrate around in the opposite direction. While this is fun for observation, I always have the urge to spin that thing back to “front” facing, so if that sort of thing bugs you… it’s probably best to try to ignore the piece of plastic you just crammed into your joystick.